Step 25Once you’ve obtained the entire blanket turned, make certain the corners are good and turned out. Find the gap you left within the seam, reach inside, allll the way right down to the other end, grab a handful and pull. Keep pulling till the blanket is right sides out. Starting an inch or two back from the curved line, backstitch along the straight seam line and then observe the marked curve.
Straight sew a 1 inch seam allowance a protracted the entire blanket. Back stitching at the very starting and finish, and at each ends of the opening the place you'll flip it inside out. On one of the sides make sure to make a mark together with your pins, and a spot about 6 inches broad. This goes to be where you'll flip the blanket right facet out when you're accomplished stitching the inside.
Again, once you get to the tip, sew proper over the earlier seam line and backstitch. If you want your blanket to have square edges, you then’ll just clip the corners like so… and then skip to where we flip the blanket out.
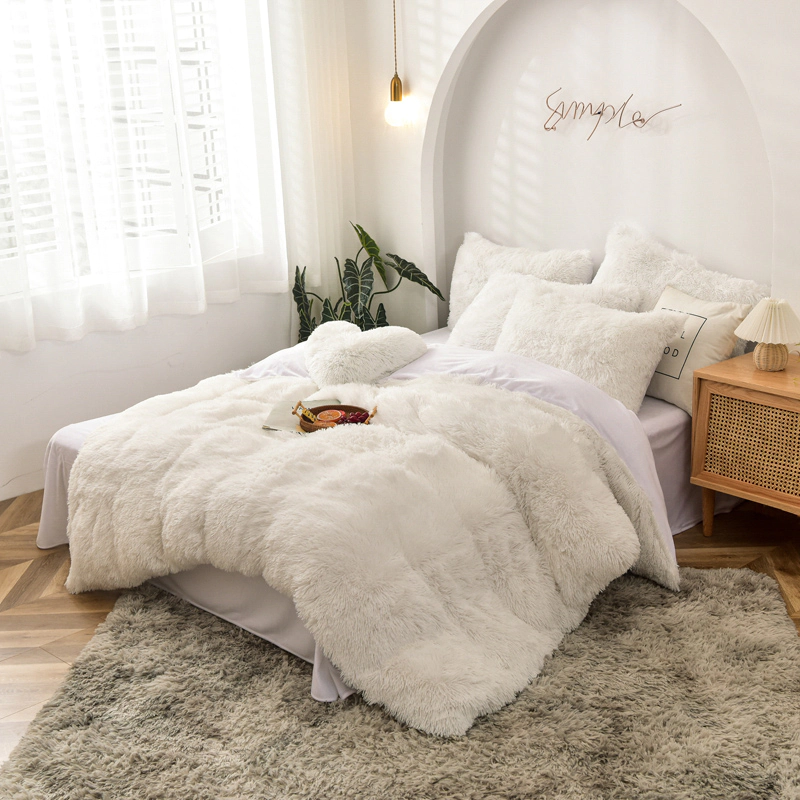
I made a smaller version about 34' sq. and the gray model is a bit larger around forty five' square. If this is your first project with minky, I suggest starting with the small version. Using a 5/8in seam allowance, choose a decorative stitch, and sew your way all around the top of the blanket. Make sure that the hole from where you turned it inside out will get sealed.
I would love so that you can link this as much as my Christmas in July linky celebration. When I sew on minki, I lengthen the sew and always use a strolling foot. This is so cute and even looks like something I would possibly be able to do! Before we start you'll need to collect your supplies. This will make a small child model, it's about 34' square.
I take into consideration making a blanket, the material is the primary thing. Once everything is pressed and pinned, we topstitch! I just like the look of two rows of topstitching on a blanket.
Once we've the highest and each side pinned, I wish to make sure all my layers are good and flat and unwrinkled. If you have somewhere you can lay the entire blanket out flat, that’s the best way. But if you’ve got restricted house — like maybe you’re working on a table high and taking pictures for a tutorial — right here’s slightly trick. Starting at the top pinned edge, roll the blanket toward the bottom like a jelly roll. If we measured proper earlier, then our woven high should be precisely lining up with the edges of the minky.
I stitched about 1/eight″ of an inch from the sting to begin, and then I did another row right next to that. I used the edge of my presser foot because the guide, so it’s about three/16″ of an inch from the primary line of topstitching.
Time to pin down each side, maintaining the perimeters nice and even. Instead of looking it up, I decided to provide it a whirl. Note that I stated WOVEN FABRICS. Do not attempt to rip the minky. Not unless you want one thing like THIS to happen.